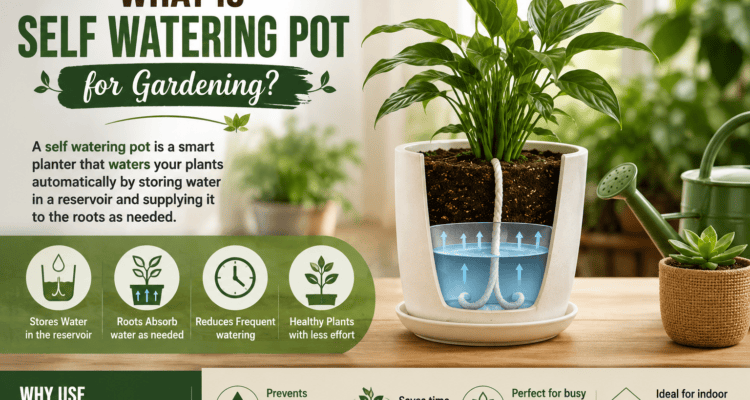
If you’ve ever come back from a weekend trip to find your tomato seedlings wilted or your money plant crisping up on the balcony railing, a self-watering pot solves that problem permanently. Instead of you deciding when the plant gets water, the plant pulls up exactly what it needs, when it needs it, from a small reservoir sitting below the soil.
The good news: you don’t need to buy an imported self-watering planter for ₹800–₹2,500. You can build one at home in under an hour using things you probably already have lying around — an old bucket, a couple of soft drink bottles, or a leftover food container. In this guide, I’ll walk you through 3 tried-and-tested DIY methods, tell you exactly what to buy and where (online and offline in Mumbai/India), and cover the one mistake — root rot — that ruins most homemade self-watering setups.
If you’re just getting your growing medium right first, read our guide on choosing the best potting mix for balcony plants before you set any of this up — a self-watering system only works well with the right soil structure.
How does a self-watering pot actually work?
Every self-watering pot has three parts:
- A water reservoir at the bottom, sealed off from the growing soil.
- A wicking material or wicking chamber (rope, cloth, or a perforated soil column) that draws water upward through capillary action — the same way a candle wick pulls up wax, or how soil naturally pulls water toward drier areas.
- An overflow hole, positioned at the top of the reservoir, so excess water drains out instead of drowning the roots.
The plant’s roots grow down toward the moisture and take up water as needed, instead of you guessing whether the topsoil is dry.
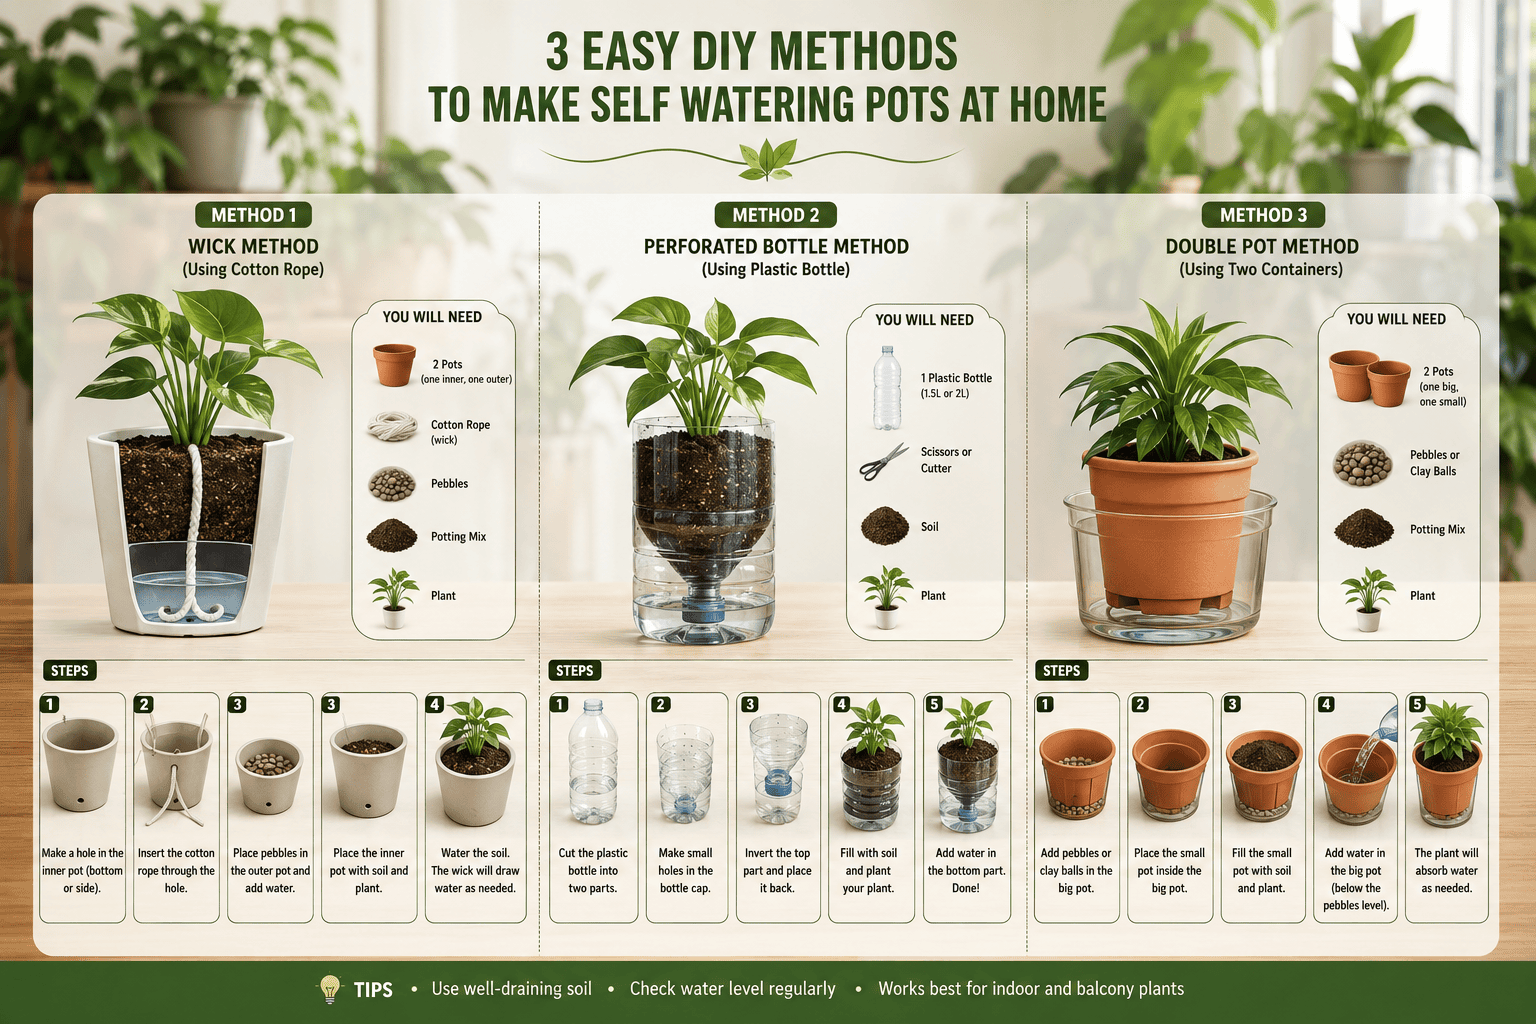
Method 1: The Classic Plastic Bottle Wick Pot
Best for herbs, seedlings, small pots
This is the simplest version — ideal for your kitchen window herb garden (coriander, mint, tulsi) or starting vegetable seedlings before transplanting them into your terrace garden beds.
Materials required
| Material | Offline sourcing | Online sourcing |
| 1 clean 2-litre plastic bottle (soft drink or water bottle) | Reuse from home; local kirana/raddiwala | N/A — reuse, don’t buy |
| Cotton string, thick cotton rope, or strips of an old cotton T-shirt (must be cotton — synthetic doesn’t wick water well) | Any local kirana or tailoring shop (darzi) sells cotton string/sutli | Amazon.in or Flipkart — search “cotton wick rope for plants” |
| Potting soil / potting mix | Local nursery (roadside plant sellers common near most Mumbai suburbs) | Amazon.in — search “organic potting mix India” |
| Sharp knife or box cutter, scissors | Any hardware/stationery shop | — |
| Drill or a heated nail/awl (to make a small hole in the cap) | Local hardware shop (bought or borrowed) | — |
| Small plant/seeds | Local nursery | Any online nursery/seed store |
Step-by-step method
- Clean the bottle thoroughly and peel off the label completely (soak in warm water if the glue is stubborn).
- Cut the bottle in half, roughly at the point where it starts to taper toward the neck (usually the top third). The bottom section becomes your water reservoir; the top (inverted) section becomes the planting chamber.
- Make a hole in the bottle cap, about 5–6 mm wide, using a heated nail or a small drill bit. Screw the cap back on.
- Prepare your wick: take 3–4 strands of cotton string, bundle them together, and tie a knot about 5 cm from one end.
- Thread the wick through the hole in the cap so the knot sits just inside the cap (this stops it slipping through), leaving the long end free.
- Invert the top half of the bottle (neck facing down) and nestle it inside the bottom half. The wick should hang down and touch the base of the reservoir.
- Fill the top half with potting mix, spreading the loose end of the wick through the soil as you go so it makes good contact — don’t let it stay bunched at the surface.
- Plant your seedling or seeds, water the topsoil once to settle it in, then fill the bottom reservoir with water through the bottle’s mouth.
How to use it: Check the reservoir every 5–7 days and top it up. In Mumbai’s summer heat, check twice a week until you know your plant’s consumption rate.
Method 2: The Two-Bucket Reservoir Pot
Best for tomatoes, chillies, brinjal, and other vegetables in your kitchen garden
This is the sturdier, higher-capacity version — perfect for vegetable grow bags or medium containers on a terrace or balcony where you want the pot to last 10–14 days between refills.
Materials required
| Material | Offline sourcing | Online sourcing |
| 2 plastic buckets or containers of the same width, one slightly deeper (5–10 litre for balconies; 15–20 litre for bigger vegetables) | Local plastics/hardware shop (Crawford Market, Dadar, or any local hardware store); or reuse paint buckets after a thorough wash | Amazon.in — search “plastic bucket with lid 10 litre” |
| A short length of PVC pipe (1 inch / 2.5 cm diameter), long enough to stick 2 inches above the rim | Local plumbing/hardware shop — sold by the foot, very cheap | Amazon.in — search “PVC pipe 1 inch” |
| A small plastic cup, yoghurt container, or net pot with holes punched in the sides (the wicking chamber) | Reuse from home | Amazon.in — search “net pots for wicking” |
| Drill (or a heated nail) and marker pen | Hardware shop | — |
| Potting mix + perlite or coco peat (improves wicking) | Local nursery | Amazon.in — search “coco peat brick India” |
Step-by-step method
- Take the top bucket (the one that will hold soil) and trace the outline of your wicking cup/net pot in the centre of its base. Cut this hole out.
- Punch multiple holes all over the sides and bottom of the wicking cup so water can enter freely — this cup will sit through the hole you just cut, hanging down into the bottom bucket.
- Cut a second hole near the edge of the top bucket’s base for the PVC pipe (your fill spout) and pass the pipe through so its bottom end sits near the base of the lower bucket, with 2 inches sticking out above the rim.
- Drill several small drainage/aeration holes (5 mm) around the top bucket, positioned at the height where the reservoir water level should max out — this is your overflow, and it’s the single most important step for preventing root rot.
- Nest the top bucket into the bottom bucket so the wicking cup dangles into the reservoir space.
- Fill the wicking cup and the rest of the top bucket with potting mix mixed with a handful of coco peat or perlite — this improves how well the mix pulls water upward.
- Plant your vegetable seedling, water the topsoil once, then fill the reservoir through the PVC pipe until water starts coming out of the overflow holes — this tells you it’s full.
How to use it: Once the plant is established, water only through the pipe. Refill when you can no longer hear/see water in the reservoir (dip a thin stick down the pipe — if it comes back dry, refill).
Method 3: The Rope-Wick Bowl Method
Best for multiple pots off one shared reservoir — great for a balcony row
If you’ve got a row of 4–6 pots along your balcony railing, this method lets you refill one central container instead of watering each pot separately — a big time-saver during Mumbai’s peak summer.
Materials required
| Material | Offline sourcing | Online sourcing |
| One wide, shallow container or bucket to act as the shared reservoir | Local plastics shop | Amazon.in — search “plastic tub with handle” |
| Cotton rope, thick cotton shoelaces, or braided cotton wick (one length per pot) | Kirana store, tailoring shop, or shoe repair (mochi) stalls sell thick cotton laces cheap | Amazon.in / Flipkart — search “cotton wick rope gardening” |
| Small nuts, bolts, or washers (to weigh the wick end down in the reservoir, optional) | Local hardware shop | — |
| Your existing balcony pots with plants already in them | — | — |
Step-by-step method
- Cut one length of cotton rope per pot, long enough to reach from the bottom of the shared reservoir up into the centre of each pot’s soil, with some slack.
- Soak all the wicks in water first — a dry wick starts pulling water much more slowly.
- Tie a small nut or washer to one end of each wick (optional, keeps it submerged and stops it floating).
- Bury the other end about 2–3 inches deep into the soil of each pot, using a pencil or chopstick to push it in without disturbing the roots — position it closer to the pot’s rim than the main stem.
- Place the shared reservoir centrally among your pots, ideally raised slightly on a brick or stool so it sits level with or above the base of the pots (gravity plus capillary action both help).
- Fill the reservoir with water and let the wicks dangle in.
How to use it: Top up the central reservoir every 4–6 days depending on how many pots are drawing from it and the weather. This method is excellent for short trips (weekend to 1-week) but check it once before you travel to confirm the flow rate works for your specific plants.
When should you use self-watering pots?
Not every plant or every corner of your garden needs one. Here’s how to decide:
Balcony garden — Ideal for railing planters and pots that get full sun for 6+ hours, since these dry out fastest in Mumbai’s heat. Herbs, leafy greens, and flowering annuals do especially well.
Home garden (indoor plants) — Great for travel-prone households and for moisture-loving plants like ferns, peace lily, and spider plant. Avoid using them for succulents and cacti — these prefer to dry out completely between waterings, and a constant reservoir will kill them faster than underwatering ever would.
Kitchen garden (vegetables) — Very effective for consistently thirsty crops like tomatoes, chillies, brinjal, and cucumbers, which are prone to blossom-end rot and fruit cracking when watering is inconsistent. Root vegetables (radish, carrot) generally do better with regular pots, since constant bottom moisture can distort root shape.
If you’re setting up a full HOA-compliant terrace or balcony vegetable patch, our guide on balcony gardening rules for Mumbai housing societies covers what’s typically allowed before you install any DIY watering system.
Tips, tricks, and how to prevent root rot
Root rot is the single biggest risk with self-watering pots, and it’s almost always caused by one of these mistakes:
- Always include an overflow hole. This is non-negotiable. Without it, the reservoir has no ceiling, and roots that touch standing water 24/7 will rot within days. Position the overflow hole at the maximum safe water level, well below where the soil sits.
- Never let the wick sit directly against the roots. The wick should end a few centimetres below the root ball, not touch it. Roots need to grow toward moisture — if they’re sitting in it constantly, they suffocate from lack of oxygen (this is the actual mechanism of root rot, not just “too much water”).
- Use a well-draining, chunky potting mix, not dense garden soil. Mix in coco peat, perlite, or coarse sand — this creates air pockets that let oxygen reach the roots even when the wick is active. Dense soil holds water like a sponge and suffocates roots fast.
- Let the reservoir run dry occasionally. Every 2–3 weeks, skip a refill and let the reservoir empty out completely before topping it up again. This mimics a natural wet-dry cycle and lets oxygen back into the root zone.
Don’t use self-watering pots during Mumbai’s monsoon for anything already exposed to rain — you’ll effectively be double-watering. Cover or disconnect the system during heavy rain spells. For more on adjusting your setup seasonally, see our monsoon gardening tips for Mumbai balconies.
- Check for algae buildup in clear plastic reservoirs (common with Method 1). Use an opaque or painted bottle, or wrap it in foil, since light exposure encourages algae which can clog the wick over time.
- Match wick thickness to plant thirst. Thirstier plants (tomatoes, cucumbers) need 2–3 wick strands or a thicker rope; smaller herbs do fine with a single thin cotton wick.
- Label your reservoir fill dates with a marker or sticker so you build a sense of your specific setup’s consumption rate over a few cycles — this is more reliable than a fixed schedule, since consumption changes with weather and plant size.
Quick comparison: Which method should you build?
| Method | Best for | Reservoir life | Difficulty |
| Bottle Wick Pot | Herbs, seedlings, single small plants | 5–7 days | Easiest |
| Two-Bucket Reservoir | Vegetables, medium-large plants | 10–14 days | Moderate |
| Rope-Wick Bowl (shared) | Multiple balcony pots, short trips | 4–6 days | Easy |
Once your self-watering pots are set up, pair them with the right growing mix and feeding schedule — check our post on indoor plant soil mixes to make sure your base soil is wicking-friendly, and our terrace garden ideas post for layout inspiration if you’re scaling this up across a full terrace setup.
Have you tried building one of these? Which method worked best for your balcony — drop a comment or tag @farmerinmumbai with your setup.

Akhilesh Maurya
Administrator at Farmer In Mumbai
- 15 Best Microgreens To Grow At Home In Your Balcony : A DIY guide
- How to Start an Areca Leaf Plate Making Business in India (2026 Guide)
- 12 Indoor Vastu Plants for Home in Mumbai With Direction And Pot Guide
- 10 Private Terrace Garden Ideas For Mumbai, Navi Mumbai And Thane Residents With Rules And Regulations
- How To Use Cocopeat For Plants : A Complete DIY Guide
- Balcony Garden Rules And Regulations In Mumbai Housing Societies
- Compost Bin For Kitchen Waste And Garden : A DIY Guide to Make, Buy and Use It
- Laid Off or Burned Out? 6 Small Garden Business Ideas You Can Start For Under ₹15,000
- Get Pesticide Free Vegetables Near Me in Mumbai: How to Verify Before You Buy
- 7 DIY Methods To Get Rid Of Mealybugs On Plants Naturally
- 10 Plants For North Facing Balcony In Mumbai, Thane And Navi Mumbai High Rise Buildings
- Best Soil Mix for Indoor Plants in Mumbai: A Plant-by-Plant Guide