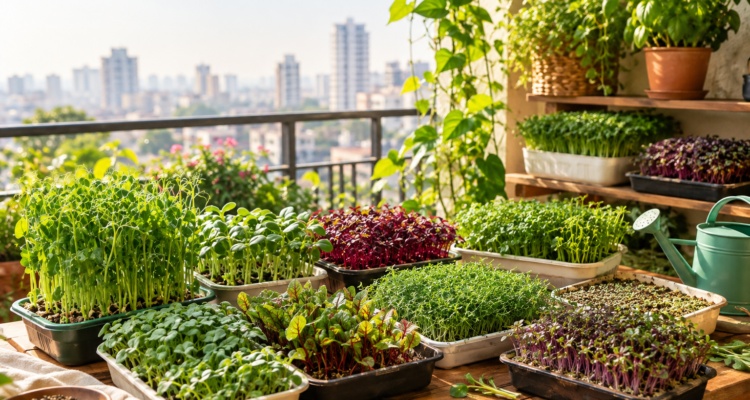
Do you live in a flat in Mumbai? Do you want fresh, healthy greens at home? The best microgreens to grow at home is the answer. They are tiny plants. You harvest them just after the first leaves appear. They grow fast. They need very little space. You can grow them on any balcony, window sill, or kitchen shelf.
In this guide, I will show you 15 best microgreens. You will learn their health benefits. You will learn what materials you need. You will learn where to buy these materials in Mumbai or online. You will learn simple steps to grow them. You will also learn how to eat them and what precautions to take.
Let’s start.
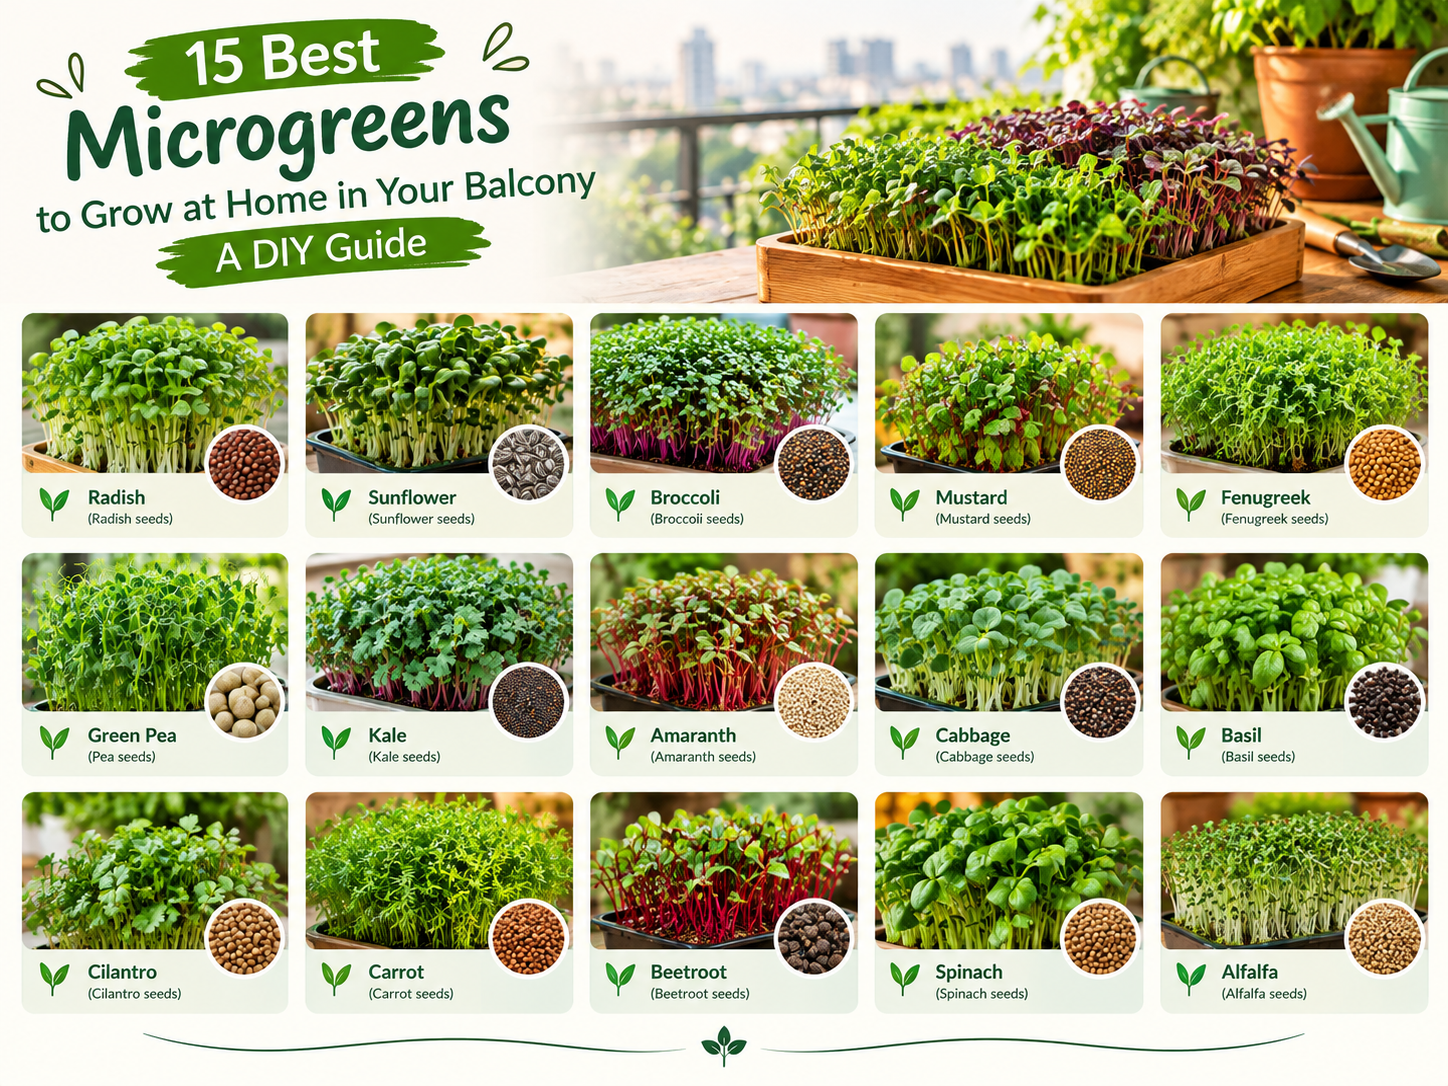
1. Radish Microgreens
Health Benefits
Radish microgreens are rich in vitamin C. They help boost your immunity. They also help with digestion. They have a peppery taste.
Materials Required
- Radish seeds
- A shallow tray with small holes
- Potting mix or coco peat
- Spray bottle
Where to Source Materials
You can buy radish seeds and coco peat from Amazon India. You can also find them at local nurseries in Mumbai, like those near Dadar or Crawford Market.
You can buy source materials from here also:
DIY Steps to Grow
- Fill the tray with 1 inch of potting mix.
- Spread radish seeds evenly on top.
- Press seeds gently into the soil.
- Spray water twice a day.
- Keep the tray in indirect sunlight.
- Harvest in 6 to 8 days when leaves are 2 inches tall.
How to Consume
Add them to sandwiches, salads, or on top of dal. They add a spicy crunch.
Precautions
Do not overwater. This can cause fungus. Always wash before eating.
2. Mustard Microgreens
Health Benefits
Mustard microgreens have a strong flavor. They are high in vitamin A and vitamin K. They support healthy bones and good eyesight.
Materials Required
- Mustard seeds
- Shallow tray
- Cocopeat or soil mix
- Spray bottle
Where to Source Materials
Mustard seeds are easy to find in your kitchen or at any grocery store. You can also order organic mustard seeds from Amazon.
DIY Steps to Grow
- Fill tray with moist cocopeat.
- Scatter mustard seeds on top.
- Cover tray lightly for 2 days to help germination.
- Remove cover and place in light.
- Water daily with a spray bottle.
- Harvest in 7 to 9 days.
How to Consume
Use in wraps, chutneys, or as a garnish on soup.
Precautions
Mustard greens taste very strong. Use small amounts if you are new to them. People with thyroid issues should eat in moderation.
3. Sunflower Microgreens
Health Benefits
Sunflower microgreens are full of protein and healthy fats. They give you good energy. They also have vitamin E, which is good for skin.
Materials Required
- Sunflower seeds (unshelled, for sprouting)
- Deep tray (at least 2 inches)
- Soil or cocopeat
- Weight (like a small plate) for the first days
Where to Source Materials
Buy raw sunflower seeds from any local grocery store or Amazon. Make sure they are not roasted or salted.
DIY Steps to Grow
- Soak seeds in water for 8 hours.
- Fill tray with soil and place soaked seeds on top.
- Cover seeds with a thin soil layer.
- Place a weight on top for 2 days. This helps roots grow strong.
- Remove weight and water daily.
- Harvest in 10 to 12 days.
How to Consume
Add to salads or blend into smoothies. They have a nutty taste.
Precautions
Always remove the outer seed shell before eating. It can be hard to digest.
4. Pea Microgreens (Matar)
Health Benefits
Pea microgreens are sweet and crunchy. They are rich in vitamin C and folate. They are good for pregnant women and for heart health.
Materials Required
- Dried green peas or yellow peas
- Tray with drainage holes
- Potting soil
- Spray bottle
Where to Source Materials
Dried peas are available at any Mumbai grocery store or supermarket. You can also buy pea seeds meant for sprouting from Amazon.
DIY Steps to Grow
- Soak peas overnight in water.
- Spread soaked peas on a tray with soil.
- Press gently and cover with a thin soil layer.
- Water twice daily.
- Keep in bright but indirect light.
- Harvest in 10 to 14 days.
How to Consume
Eat raw in salads or add to stir fry at the last minute.
Precautions
Peas need more water than other microgreens. Do not let the soil dry out completely.
5. Fenugreek Microgreens (Methi)
Health Benefits
Methi microgreens help control blood sugar. They are good for people with diabetes. They also help with hair health.
Materials Required
- Fenugreek seeds
- Shallow tray
- Cocopeat or soil
- Spray bottle
Where to Source Materials
Fenugreek seeds are in every Indian kitchen. You can also buy them fresh from a local spice shop or Amazon.
DIY Steps to Grow
- Soak fenugreek seeds for 6 hours.
- Spread over moist soil in the tray.
- Press seeds lightly.
- Spray water twice a day.
- Keep tray in a shaded, warm spot.
- Harvest in 8 to 10 days.
How to Consume
Add to parathas, curries, or salads. The taste is slightly bitter, like methi leaves.
Precautions
Do not eat too much if you have low blood sugar, since it lowers sugar levels further. Pregnant women should ask a doctor before eating large amounts.
6. Coriander Microgreens (Dhania)
Health Benefits
Coriander microgreens are rich in antioxidants. They help with digestion. They also add fresh flavor to food.
Materials Required
- Coriander seeds (crushed lightly)
- Tray
- Soil mix
- Spray bottle
Where to Source Materials
Coriander seeds are found in every kitchen or spice shop. You can also buy them from Amazon or a local nursery.
DIY Steps to Grow
- Crush coriander seeds slightly to split them into two halves.
- Soak in water for 24 hours.
- Spread on moist soil.
- Cover lightly and keep in a warm, dark spot for 3 days.
- Move to light once sprouts appear.
- Harvest in 15 to 18 days. Coriander is slower than other microgreens.
How to Consume
Use as garnish on any Indian dish, just like regular coriander leaves.
Precautions
Coriander microgreens take longer to grow. Be patient and keep soil moist, not wet.
7. Broccoli Microgreens
Health Benefits
Broccoli microgreens are very powerful. Studies show they have more nutrients than full-grown broccoli. They help fight inflammation and support a healthy heart.
Materials Required
- Broccoli seeds (for sprouting, not eating seeds)
- Shallow tray
- Cocopeat
- Spray bottle
Where to Source Materials
Broccoli sprouting seeds are best bought from Amazon or a dedicated microgreens seed seller online. Regular vegetable seeds from a nursery also work.
DIY Steps to Grow
- Soak seeds for 6 hours.
- Spread evenly on moist cocopeat.
- Cover tray for 2 days.
- Uncover and place in indirect light.
- Water daily with spray bottle.
- Harvest in 8 to 10 days.
How to Consume
Add to salads, sandwiches, or smoothies. They have a mild broccoli taste.
Precautions
Buy seeds only from trusted sellers. Some garden seeds are treated with chemicals and are not safe to eat.
8. Beetroot Microgreens
Health Benefits
Beetroot microgreens are rich in iron. They help build healthy blood. They also have a nice pink-red color that looks good on plates.
Materials Required
- Beetroot seeds
- Tray
- Soil mix
- Spray bottle
Where to Source Materials
Buy beetroot seeds from a local nursery or Amazon garden store.
DIY Steps to Grow
- Soak seeds for 24 hours before planting.
- Spread on moist soil.
- Cover with a thin soil layer.
- Water twice a day.
- Keep tray in bright, indirect light.
- Harvest in 10 to 12 days.
How to Consume
Use in salads or as a colorful garnish on soups.
Precautions
Germination can be slow and uneven. Do not worry if some seeds sprout later than others.
9. Amaranth Microgreens (Chaulai)
Health Benefits
Amaranth microgreens are rich in calcium and iron. They help keep bones strong. They also have a bright red-pink color, full of antioxidants.
Materials Required
- Amaranth seeds
- Shallow tray
- Cocopeat
- Fine mist spray bottle
Where to Source Materials
Amaranth seeds are available at organic stores in Mumbai or on Amazon under the name “rajgira” or “chaulai” seeds.
DIY Steps to Grow
- Mix seeds with a little sand for even spreading, since seeds are very tiny.
- Spread thinly on moist cocopeat.
- Do not cover with soil, just press gently.
- Mist with water twice a day.
- Keep in indirect light.
- Harvest in 10 to 12 days.
How to Consume
Add to salads or use as a garnish. The color makes any dish look attractive.
Precautions
Seeds are very small. Do not overwater, or seeds may wash away.
10. Wheatgrass
Health Benefits
Wheatgrass is known for detox benefits. It is rich in chlorophyll. Many people drink wheatgrass juice for better digestion and energy.
Materials Required
- Whole wheat berries (not flour)
- Deep tray
- Soil
- Spray bottle
- A juicer or blender (for consumption)
Where to Source Materials
Wheat berries can be bought from an organic store or Amazon. Some grocery stores also sell whole wheat grain that works well.
DIY Steps to Grow
- Soak wheat berries in water for 12 hours.
- Spread soaked seeds on soil in a deep tray.
- Cover with a thin soil layer.
- Water daily and keep in indirect light.
- Harvest in 8 to 10 days, when grass is 4 to 6 inches tall.
How to Consume
Cut grass and blend with water to make juice. Strain before drinking.
Precautions
Only cut the grass once, from the base. It will not regrow well after cutting. Drink fresh, since juice loses nutrients quickly.
11. Basil Microgreens
Health Benefits
Basil microgreens have a strong aroma. They are rich in vitamin K. They also have calming properties and support good digestion.
Materials Required
- Basil seeds
- Shallow tray
- Cocopeat
- Spray bottle
Where to Source Materials
Basil seeds, also called sabja or tulsi seeds, are found at any Mumbai grocery store or Amazon.
DIY Steps to Grow
- Soak seeds for 15 minutes, since they form a gel-like coating.
- Spread on moist cocopeat.
- Do not cover with soil.
- Mist with water once a day.
- Keep in bright, indirect light.
- Harvest in 12 to 15 days.
How to Consume
Add to salads, pasta, or as garnish on soups.
Precautions
Basil microgreens grow slowly. Keep patience and avoid direct hot sun, which can burn young leaves.
12. Cabbage Microgreens
Health Benefits
Cabbage microgreens are rich in vitamin C and fiber. They support good digestion and healthy skin.
Materials Required
- Cabbage seeds
- Tray
- Soil mix
- Spray bottle
Where to Source Materials
Cabbage seeds are sold at local nurseries and on Amazon garden stores.
DIY Steps to Grow
- Spread seeds evenly on moist soil.
- Press gently, no need to soak first.
- Cover lightly with soil.
- Water twice a day.
- Keep tray in indirect light.
- Harvest in 8 to 10 days.
How to Consume
Use in salads, wraps, or sandwiches for a crunchy bite.
Precautions
Keep soil moist but not soggy. Too much water can cause mold.
13. Onion Microgreens
Health Benefits
Onion microgreens have a mild onion flavor. They are rich in vitamin C and help boost immunity.
Materials Required
- Onion seeds
- Tray
- Soil mix
- Spray bottle
Where to Source Materials
Onion seeds are available at nurseries or on Amazon under garden seeds.
DIY Steps to Grow
- Spread onion seeds thickly on moist soil.
- Press gently into soil.
- Water daily with spray bottle.
- Keep in indirect light.
- Harvest in 12 to 15 days.
How to Consume
Use as a garnish on curries, soups, or salads for a light onion taste.
Precautions
Onion microgreens grow slowly and thin. Do not expect thick, dense growth like other greens.
14. Chia Microgreens
Health Benefits
Chia microgreens are rich in omega-3 fatty acids. They support heart health and are good for skin.
Materials Required
- Chia seeds
- Shallow tray
- Cocopeat
- Spray bottle
Where to Source Materials
Chia seeds are easily found in supermarkets or on Amazon.
DIY Steps to Grow
- Spread chia seeds evenly on moist cocopeat.
- Do not cover with soil, since seeds need light to sprout.
- Mist with water twice a day.
- Keep in bright, indirect light.
- Harvest in 8 to 10 days.
How to Consume
Sprinkle on salads, yogurt, or smoothie bowls.
Precautions
Chia seeds form a gel layer when wet. Mist gently so seeds do not clump together.
15. Buckwheat Microgreens
Health Benefits
Buckwheat microgreens are rich in rutin, a plant compound. They support healthy blood vessels and good circulation.
Materials Required
- Raw buckwheat seeds (unhulled, with husk on)
- Deep tray
- Soil mix
- Spray bottle
Where to Source Materials
Buy unhulled buckwheat seeds from an organic store or Amazon. Regular buckwheat flour will not work.
DIY Steps to Grow
- Soak seeds for 8 hours.
- Spread on moist soil.
- Cover with a thin soil layer.
- Water daily.
- Keep in indirect light.
- Harvest in 8 to 10 days.
How to Consume
Add to salads or sandwiches. They have a slightly tangy, crunchy taste.
Precautions
Remove seed husks after harvest, since they can be hard to chew. Buckwheat can cause skin sensitivity to sunlight in rare cases, so wash hands after handling.
General Tips for Growing Microgreens in a Mumbai Balcony
- Use trays with drainage holes to avoid root rot.
- Mumbai’s humid weather can cause mold. Keep good airflow around trays.
- Avoid direct harsh afternoon sun. Morning light or a shaded balcony spot works best.
- Wash all microgreens well before eating, since they grow close to soil.
- Use clean, food-safe trays only.
- Label each tray with the sowing date, so you know when to harvest.
Final Thoughts
Microgreens are one of the easiest ways to grow fresh, healthy food at home. You do not need a big garden or farm. A small balcony corner is enough. Pick two or three from this list to start. Once you get comfortable, try growing all 15 and enjoy fresh greens all year round.
Happy growing!

Akhilesh Maurya
Administrator at Farmer In Mumbai
- How to Start an Areca Leaf Plate Making Business in India (2026 Guide)
- 12 Indoor Vastu Plants for Home in Mumbai With Direction And Pot Guide
- 10 Private Terrace Garden Ideas For Mumbai, Navi Mumbai And Thane Residents With Rules And Regulations
- How to Make Self Watering Pots at Home : 3 Easy DIY Methods
- How To Use Cocopeat For Plants : A Complete DIY Guide
- Balcony Garden Rules And Regulations In Mumbai Housing Societies
- Compost Bin For Kitchen Waste And Garden : A DIY Guide to Make, Buy and Use It
- Laid Off or Burned Out? 6 Small Garden Business Ideas You Can Start For Under ₹15,000
- Get Pesticide Free Vegetables Near Me in Mumbai: How to Verify Before You Buy
- 7 DIY Methods To Get Rid Of Mealybugs On Plants Naturally
- 10 Plants For North Facing Balcony In Mumbai, Thane And Navi Mumbai High Rise Buildings
- Best Soil Mix for Indoor Plants in Mumbai: A Plant-by-Plant Guide
[…] you are new to microgreens, first read our guide on 15 Best Microgreens To Grow At Home In Your Balcony. That post tells you which greens to grow. This post tells you what material to […]
[…] If you have not started growing yet, first read our guide on the 15 best microgreens to grow at home in your balcony. […]
[…] our guide on the 15 best microgreens to grow at home in your balcony. It shows you the taste, growing time and steps for each […]