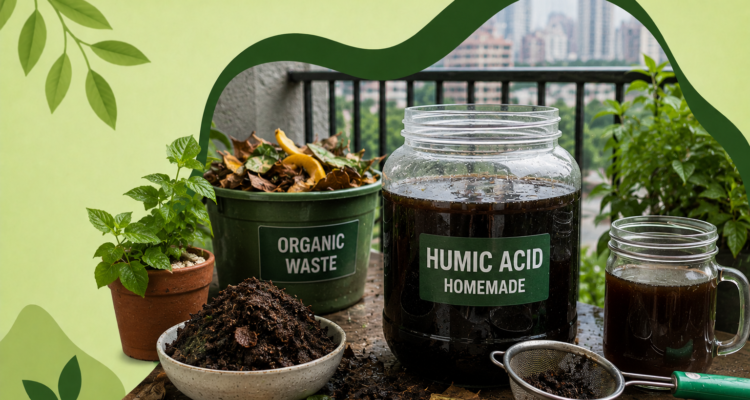
(Using Cow Dung Cakes and Dry Leaves) — Easy DIY Guide
A step-by-step guide from Farmer in Mumbai to make your own liquid humic acid at home, using cow dung cakes (kande) and dry leaves. No costly inputs needed.
If you search “how to make humic acid at home” or “ghar par humic acid kaise banaye,” you will find many hard, technical answers. This guide is different. We use simple words and simple steps. You can follow it even if you are a beginner gardener.
What Is Humic Acid?
Humic acid is a natural substance found in soil, compost, and old organic matter. It forms when plant and animal material breaks down slowly over a long time. Farmers and gardeners use humic acid to make soil healthy and to help plants grow stronger roots.
You may have seen products like “humic acid fulvic acid 98” or “humic acid + fulvic acid 98” in the market. These are concentrated powder forms. But you can also make a simple liquid version at home for free, using cow dung cakes and dry leaves.
Why Humic Acid Is Good for Plants
Here are the main benefits of using humic acid for plants:
- Better root growth – Humic acid helps roots grow longer and stronger.
- More nutrients for plants – It helps plant roots absorb nutrients from the soil more easily.
- Healthier soil – It improves soil texture and helps good microbes grow.
- Less water stress – Soil treated with humic acid holds water better.
- Works well for all crops – It is used in home gardens as well as in farming, including humic acid use in sugarcane and other field crops.
Things You Need
Before you start, collect these simple items:
- Dried cow dung cakes (kande) – 4 to 5 pieces
- Dry leaves – 1 small bucket full
- A metal container or pit for burning
- Water – 5 to 6 litres
- A large plastic bucket or drum with a lid
- A wooden stick, for stirring
- A clean cloth, for filtering
- A storage bottle or jar
Step-by-Step DIY Method
Step 1: Gather Your Materials
Collect dried cow dung cakes and dry leaves. Make sure they are fully dry. Wet material will not burn well and will not make good char.
Step 2: Burn the Material to Make Char
Burn the cow dung cakes and dry leaves together in an open, safe space, away from your house and any flammable items. Do not let them burn to full ash. You want partly burnt, black char pieces, not fine white ash. This char is the main source of humic acid.
Safety tip: Always burn in an open area, keep water or sand nearby, and never leave the fire unattended.
Step 3: Cool and Soak the Char in Water
Let the char cool down completely. Break it into small pieces with your hands or a stick. Put the char pieces into your bucket or drum, then add 5 to 6 litres of water. Stir well with your wooden stick.
Cover the bucket and leave it to sit for 5 to 7 days. Stir it once a day. During this time, the water slowly pulls out the humic acid from the char. This is the same natural process that happens in soil, just faster.
Step 4: Filter the Liquid
After 5 to 7 days, the water will turn dark brown or blackish. This colour shows that humic acid has dissolved into the water. Pour the liquid through a clean cloth into a jar or bottle. This removes any leftover solid pieces.
Your homemade liquid humic acid is now ready to use.
Step 5: Apply Humic Acid to Your Plants
Now it’s time to use your homemade humic acid.
How to use humic acid liquid for plants:
- Mix 1 part of your homemade humic acid liquid with 8 to 10 parts of plain water.
- Water the soil around the plant roots with this mixture, once every 15 to 20 days.
- You can also fill this diluted mixture into a spray bottle for a light foliar spray on leaves.
Humic Acid vs Fulvic Acid: What’s the Difference?
People often confuse these two. Here is the simple difference:
| Point | Humic Acid | Fulvic Acid |
| Molecule size | Larger | Smaller |
| Where it works | Mostly in soil | Enters plant tissue faster |
| Main benefit | Improves soil structure, root growth | Improves nutrient movement inside the plant |
| Colour | Dark brown to black | Light yellow to brown |
Products labelled “humic acid + fulvic acid 98” combine both, which is why they work well together. Your homemade version mainly gives you humic acid, which is still very useful for garden soil.
Tips for Best Results
- Use only dry, well-burnt char. Wet or half-burnt material gives weaker results.
- Store your homemade humic acid liquid in a shaded place, away from direct sunlight.
- Use it within 2 to 3 months for the best effect.
- Do not use full-strength liquid directly on young seedlings; always dilute it first.
- This homemade version works alongside products like humic plus soil conditioner, but check the label before mixing two different inputs together.
Frequently Asked Questions
Can I make humic acid at home for free?
Yes. Cow dung cakes and dry leaves are the only main materials, and both are often free or very cheap in most homes and farms.
How do I know my humic acid is working?
Watch for darker green leaves, stronger root growth, and better plant growth after a few applications.
Can I use humic acid for sugarcane and field crops?
Yes, humic acid use in sugarcane and other field crops is common in Indian farming. The same homemade method can be scaled up for larger quantities, using bigger drums and more char.
Is homemade humic acid as strong as shop-bought humic acid powder (98%)?
No, homemade liquid humic acid is milder in strength compared to concentrated commercial powders. But it is a good, low-cost option for home gardens and small farms.
Conclusion
Making humic acid at home is simple, low-cost, and good for your plants. With just cow dung cakes, dry leaves, water, and a little patience, you can make your own natural plant booster. Try this DIY method in your garden and see the difference in root growth and plant health within a few weeks.
Have questions about using humic acid for your plants? Share them in the comments below, and don’t forget to check out more DIY gardening guides on Farmer in Mumbai.

Akhilesh Maurya
Administrator at Farmer In Mumbai
- 15 Best Microgreens To Grow At Home In Your Balcony : A DIY guide
- How to Start an Areca Leaf Plate Making Business in India (2026 Guide)
- 12 Indoor Vastu Plants for Home in Mumbai With Direction And Pot Guide
- 10 Private Terrace Garden Ideas For Mumbai, Navi Mumbai And Thane Residents With Rules And Regulations
- How to Make Self Watering Pots at Home : 3 Easy DIY Methods
- How To Use Cocopeat For Plants : A Complete DIY Guide
- Balcony Garden Rules And Regulations In Mumbai Housing Societies
- Compost Bin For Kitchen Waste And Garden : A DIY Guide to Make, Buy and Use It
- Laid Off or Burned Out? 6 Small Garden Business Ideas You Can Start For Under ₹15,000
- Get Pesticide Free Vegetables Near Me in Mumbai: How to Verify Before You Buy
- 7 DIY Methods To Get Rid Of Mealybugs On Plants Naturally
- 10 Plants For North Facing Balcony In Mumbai, Thane And Navi Mumbai High Rise Buildings